What's new in CLZ Books?
In April 2025, we introduced one of the biggest new features ever: the automatic downloading of book values. The feature had been requested by many users for years, so the introduction of this feature was a huge success: Most users loved the new values!
However, a small group of users absolutely hated the new feature. They found the values annoying, not necessary, too “commercial”, irrelevant, etc…
We did not see that coming…. our fault. Maybe with our years of experience as software developers, we could have expected this. Guess we were too excited about the feature ourselves 🙂
Looking back, we should have made the entire feature optional from the start.
Of course, making it optional is still possible and that is exactly what we did for this update today. If you don’t want automatic values for your books, you can now disable downloading them via the new “Download Values” checkbox in the Settings screen (menu top left, then click Settings)
When you disable this setting, no book values will be downloaded anymore for any future books you add. On top of that it will also remove all automatic values you already have (any “My Values” you have will remain).
A small update for the CLZ Books app, with two changes requested by users:
New: Disable the downloading of book values
In April 2025, in version 10.2, we introduced one of the biggest new features ever: the automatic downloading of book values. The feature has been requested by many users for years, so the introduction of this feature was a huge success: MOST users loved the new values!
However, a small group of users absolutely HATED the new feature. They found the values annoying, not necessary, too “commercial”, etc…
We did not see that coming…. our fault. Maybe with our years of experience as software developers, we could have expected this. Guess we were too excited about the feature ourselves 🙂
Looking back, we should have made the entire feature OPTIONAL from the start.
Of course, making it optional is still possible and that is exactly what we did for this update today. If you don’t want automatic values for your books, you can now disable downloading them via the new “Download Values” toggle in the Settings screen.
When you disable this setting, no book values will be downloaded anymore for any future books you add. On top of that it will also remove all automatic values you already have (any “My Values” you have will remain).
New: Search your database by ISBN13 or ISBN10
For all books in your database, the app normally stores the ISBN in ISBN13 notation, even for older books that original had an ISBN in ISBN10 format. However, this caused problems when searching your database using the ISBN10 notation, it would not find the book.
In today’s update, we fixed that, by including both the ISBN13 AND the ISBN10 notation in the app’s internal search index.
Searching your app by ISBN13 or ISBN10 will now find the book, no matter if you have ISBN10 or ISBN13 filled in for it.
Fixed:
- iPad only: Tap area for certain pick list fields in the Edit Book screen wasn’t correct
How to update your app to the new version:
- On your device, open the App Store app.
- Search for “CLZ” and select the CLZ Books app.
- Tap “Update” to update the app.
v10.5 Android: Smoother navigation / Disable book values / Search by ISBN10
A small update for the CLZ Books app, with two changes requested by our users and one optimization that we came up with ourselves:
Smoother navigation between folders, book list and book details
This one is for the Android users!
Our Android developer Pim was working on the app’s main screen and he saw some opportunities for improvement. Mainly to reduce slowness and stuttery behaviour when navigating back and forth between the folder list, the book list and book details page.
So instead of starting on the next new feature, we gave him a few days to refactor the code and improve existing functionality.
The result of Pim’s work is live now, in version 10.5.1 of the CLZ Books app.
We have been testing the new update quite a bit and we think it feels a lot snappier and smoother, especially noticeable on larger collections.
We hope you will notice the improvements too and that it will make you enjoy the app even more!
New: Disable the downloading of book values
In April 2025, in version 10.2, we introduced one of the biggest new features ever: the automatic downloading of book values. The feature has been requested by many users for years, so the introduction of this feature was a huge success: MOST users loved the new values!
However, a small group of users absolutely HATED the new feature. They found the values annoying, not necessary, too “commercial”, etc…
We did not see that coming…. our fault. Maybe with our years of experience as software developers, we could have expected this. Guess we were too excited about the feature ourselves 🙂
Looking back, we should have made the entire feature OPTIONAL from the start.
Of course, making it optional is still possible and that is exactly what we did for this update today. If you don’t want automatic values for your books, you can now disable downloading them via the new “Download Values” toggle in the Settings screen.
When you disable this setting, no book values will be downloaded anymore for any future books you add. On top of that it will also remove all automatic values you already have (any “My Values” you have will remain).
New: Search your database by ISBN13 or ISBN10
For all books in your database, the app normally stores the ISBN in ISBN13 notation, even for older books that original had an ISBN in ISBN10 format. However, this caused problems when searching your database using the ISBN10 notation, it would not find the book.
In today’s update, we fixed that, by including both the ISBN13 AND the ISBN10 notation in the app’s internal search index.
Searching your app by ISBN13 or ISBN10 will now find the book, no matter if you have ISBN10 or ISBN13 filled in for it.
Fixed:
- A couple of navigation issues
How to update your app to the new version:
- On your device, open the Play Store app.
- Search for “CLZ” and select the CLZ Books app.
- Tap “Update” to update the app.
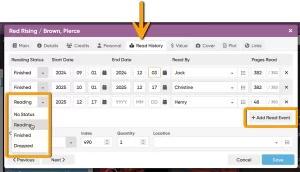 As announced in our monthly newsletter, here it is, a huge update for your CLZ Books Web software. The updates brings several new features and data fields that have been requested by our customers through the years:
- Track your Reading History, with multiple read sessions, each having Start and End Dates, Reading Status, Reading Progress and Reader fields.
- New dimension fields: Spine Thickness and Weight, delivered automatically from Core!
- Next to Book Condition, a new field for the Dust Cover Condition
- Place of Publication, plus Original Place of Publication
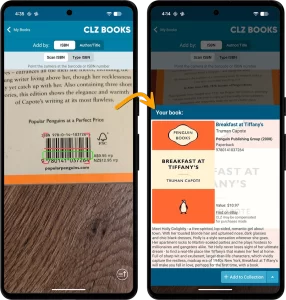 Adding books by scanning/reading ISBN barcodes is one of the most popular features of the CLZ Books app. Just scan ISBNs, bleep, bleep, bleep, and the scanned books are added to a “queue”. Then use the Add button at the bottom to add all queued books to your database in one go. Quick and efficient.
However, we always like to keep improving the app, or at least give users multiple options. So today we have added a new “One-by-One” mode to the Add by ISBN screen, that is, without a queue.
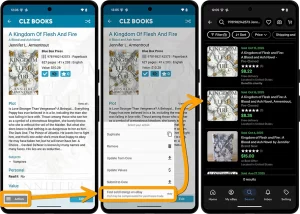 You may have already read about this when we introduced the eBay links in the CLZ Books Web software, but… today we are introducing the same feature in the CLZ Books mobile app:
the app now includes automatically generated eBay search links, that let you find eBay listings for that particular book.
These eBay links can be useful to:
- easily find available copies to buy on eBay (e.g. for your wish list items)
- quickly get a feel for one book’s value, by finding its’ Completed/Sold listings on eBay.
( of course, to get values for all your books in one go, use Update Values from the menu)
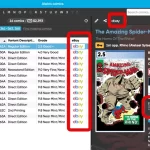 Two weeks ago, we introduced the new “Automatic eBay search links” in your CLZ Web software. After launch, we received quite a bit of feedback about this feature, both positive and… let me say… less positive 🙂
So we sat down, went over all feedback, and then came up with some tweaks to make everyone happy!
First, I have to repeat: this feature is OPTIONAL.
Most users love having the quick and easy access to eBay listings for their collectibles, either to:
- easily get a feel for an item’s value, by finding its Completed/Sold listings on eBay.
- easily find available copies on eBay, useful for your wish list items.
However, if you don’t see the value in this, if you don’t find this useful, then you can easily DISABLE this feature in the CLZ Web’s Settings screen, on the bottom right, under “eBay search links”.
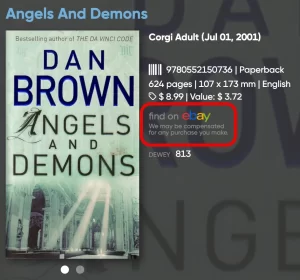 New in your CLZ Books Web software today:
In the book details panel, to the right of the cover image, it now includes an automatically generated eBay search link, that lets you find eBay listings for that particular book.
This is a new feature we know many users will find useful, others may go “meh” and a small group of users may absolutely hate it 🙂
That is why this feature is optional. You can switch it OFF using the Settings screen.
Automatic eBay search links
These eBay links can be useful for two reasons:
- For the books you own: easily get a feel for a book’s value, by finding its’ Completed/Sold listings on eBay.
- For the books on your wish list: easily find available copies on eBay, for you to purchase.
Please note: the eBay links include our CLZ Partner ID, which means that we may earn a commission on any purchase you make after clicking the link.
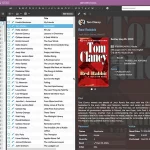 Three weeks ago, we did a huge “more compact design” update. Today, we are continuing with another update that improves the design, layout and performance of your book details panel.
Here’s what has changed:
- Flexible layout: the layout now fully adapts to the width of your details panel.
- Fields moved: we moved some fields around, to make sure the most important fields are at the top.
- Faster loading: the details panel now loads much faster, as it now delays the loading of the backdrop.
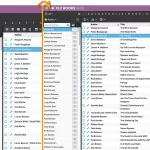 A huge update for your CLZ Books Web software today, which dramatically improves the look and usability:
- A new, more compact, design and layout, so that you fit more data on screen
- Improved layout of the “book details” panel, with better support for back covers
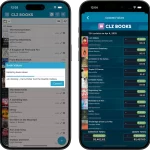 Live today: a huge v10.2 update for your CLZ Books mobile app, with one big new feature:
Automatic book values
You can now get get values for your books from CLZ Core, based on average prices on various online used book stores. Values are automatically filled in when you Add Books from Core.
To get values for your existing books, use Update Values from the menu.
You can also use this, e.g. weekly, to get updates for the values.
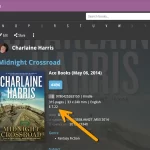 Live today: a huge update for the CLZ Books Web web-based software, with one big new feature:
Automatic book values
You can now get get values for your books from CLZ Core, based on average prices on various online used book stores. Values are automatically filled in when you Add Books from Core.
To get values for your existing books, use Update Values from the menu.
You can also use this, e.g. weekly, to get updates for the values.
This is a recommended security update:
- 2FA support: if you have 2FA enabled on your CLZ Account, the app will now ask you for the 2FA authenticator code when you log in to the app
- Several other changes to better secure your account
- New “Change email address” link in the CLZ Account screen
Fixed on Android:
- On startup, the collection tab-bar on startup could be blocked by Android navigation bar
- Dark mode: buttons on ISBN keypad were invisible- Dark mode: buttons on ISBN keypad were invisible
A small update for your CLZ Books Web software today.
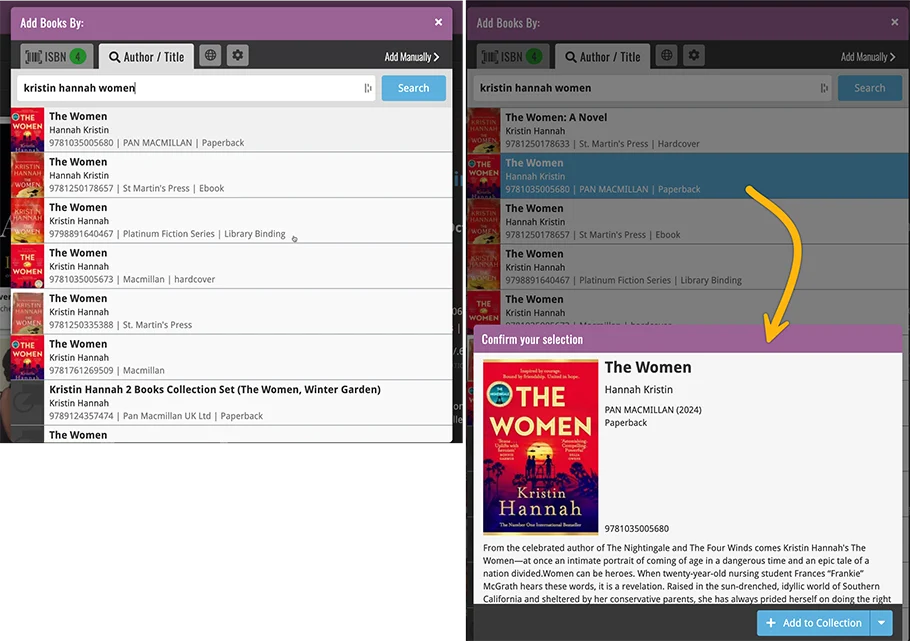
We improved the Add Books screen to make it more compact, better looking and a bit snappier to use.
The main change is that the Preview panel on the right has been replaced with a nice and quick “Confirm” popup, that just slides in from the bottom.
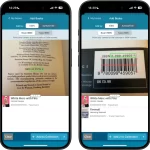 CLZ Books version 10 is here! And this big update is all about adding books by ISBN.
Here’s what’s new in the Add Books screen:
- Scan screen now also “reads” actual ISBN numbers using OCR
- New scanning feedback shows where it “sees” a barcode or ISBN number
- Now quickly detects ISBN barcodes and ISBN number in entire scan screen
- Faster online ISBN lookups for most ISBNs
- New “Type ISBN” tab: enter ISBNs manually, use external barcode scanner
Sneak Preview: CLZ Books 10.0 – Add books by reading ISBN numbers with OCR
 A big v10.0 update is coming up for your CLZ Books app within 2 weeks, so here’s a Sneak Preview!
CLZ Book 10.0 will bring a vast improvement to the Add Books by ISBN feature!
Previously the scan screen could only scan ISBN barcodes, but v10 will also “read” ISBN numbers that are printed on the book using OCR (Optical Character Recognition).
 We have changed our company name!
We were previously called “Collectorz.com”, but as everyone called us “CLZ”, we figured, let’s go with the flow and officially rename the company to just “CLZ”!
But that’s not all. This week also brings:
- a new company logo and styling
- a completely new website at clz.com (previously www.collectorz.com)
- new names for our web-based software, previously called Connect, now simply CLZ Comics Web, CLZ Movies Web, CLZ Games Web, etc…
- new app icons for all CLZ apps!
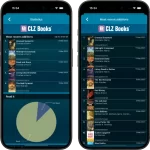 A nice update for CLZ Books again, in which we did improvements to several areas of the app.
- Re-design of the Sort Order screen
- New Date and Month folder options for all date fields
- Statistics: new look for Most Recent lists
In today’s update, we improved the behaviour after searching using the search box top right.
Previously, when you selected a book from the “suggestions dropdown”, the software would take you to a separate full screen page showing the details of that book. This behaviour was a bit annoying as it would take you away from the main screen and you needed to click “Back” on the top left to get back to it. Also, the main screen would then show you the full collection again and would be scrolled back at the top again. Meh..
Read more
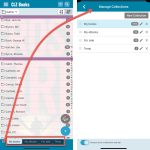 A big update v9.0 update for your CLZ Books app today, with many new features and improvements!
Here’s the full list of What’s New:
- New collections tab-bar: easily switch between collections using tabs at the bottom
- Adding Books: quick “Confirm” pop-ups, instead of full screen Preview pages
- Add by ISBN: Better screens for dealing with “ISBN not found” situations
- Add by ISBN: Faster camera barcode scanner for scanning ISBN barcodes
- New setting “Show Read-It” for showing/hiding Read-It eye icons from list and details
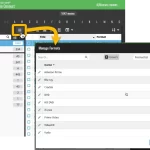 A big update for your Book Connect web-based software today, which is all about pick list fields.
Pick list fields (and the pick lists behind them) are an important part of your book database. These are the fields in the Edit screen that let you pick from a list of possible values, with that list being fully configurable by you the user.
Examples of pick list fields are Location, Owner, Format, Genres and Subjects (both multi value pick list fields), but also Author, Publisher and Series.
Now, a lot of the questions we usually get about Book Connect are related to pick list fields and can usually be answered with:
“Just use the Manage Pick Lists screen”
Renaming Locations, Merging duplicate Authors, fixing author sort problems, fixing typos in author names, etc… it is all done in the Manage Pick Lists (MPL) screen. An important and powerful screen, but… not so easy to find if you don’t know where to look or don’t even know what to look for.
With today’s Connect update, we are making this a lot easier: We have improved the Manage Pick Lists screen itself AND made it more accessible / discoverable:
In short:
- Improved Manage Pick Lists (MPL) screen
- Easy access to the MPL screen right from the folder panel
- Refreshed Edit Comic screen, with better pick list fields and direct MPL access
Thanks to our translator Peter Stickler, the Connect web-based software is now available in Swedish!
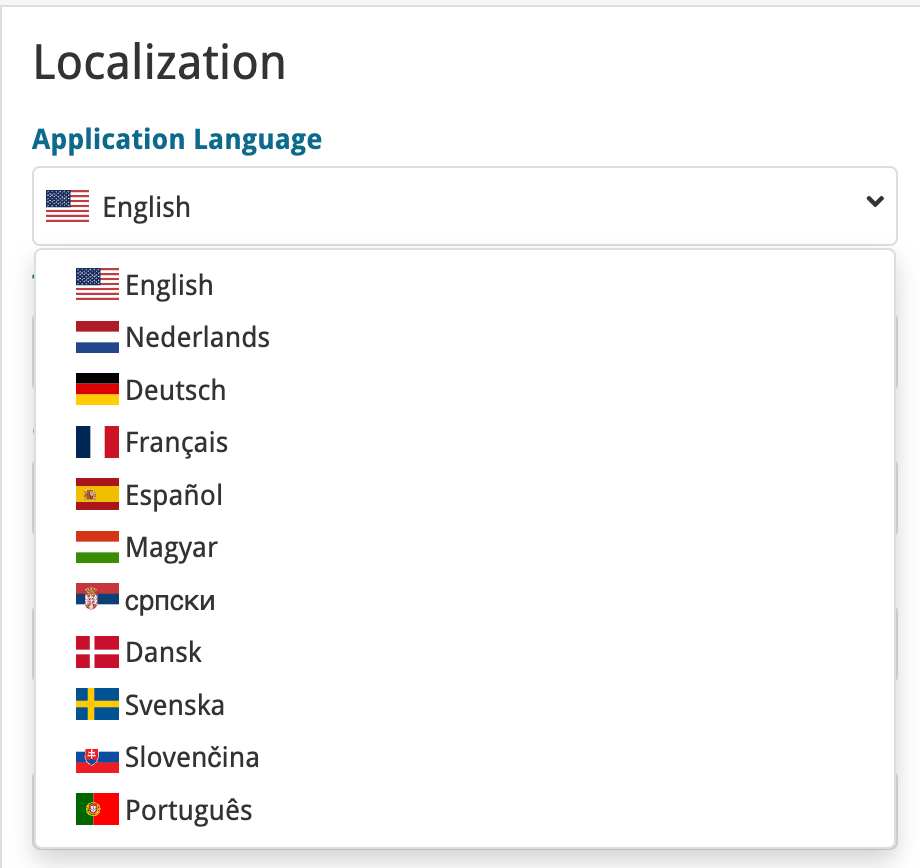
If you are interested in translating Connect to your language, let us know!
The main translations we are looking for at the moment are:
- Norwegian
- Italian
Thanks to our translator Frank Silas Kesia Jensen, the Connect web-based software is now available in Danish!

If you are interested in translating Connect to your language, let us know!
The main translations we are looking for at the moment are:
- Norwegian
- Swedish
- Italian
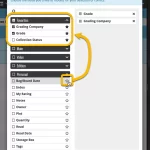 Here’s the latest results from our endeavour to improve the UI/UX of all Connect features and screens. Today, we made further improvements to both the “Manage Collections” tools and the new Edit Multiple tool.
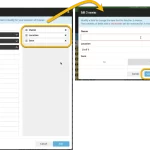 The Edit Multiple feature is an efficient tool for making changes to multiple (or all) of your database entries in one go. It has been part of the Connect web-based software for many years (since May 2015!). For the CLZ mobile apps, this “batch editing” ability was introduced much later, in July 2020.
However, when we did that, we were forced to completely re-design the feature’s user interface, to make it work well on the small phone screen. And a strange thing happened: the UI/UX we ended up with, turned out be much better than the original Edit Multiple design of the Connect web-based software and the Collector desktop software 🙂
So today, we are bringing that new Edit Multiple setup to the Connect web-based software!