 Connect and CLZ Cloud users often ask us about printing or exporting only a part of their collection, e.g. “how do I print just my wish list?” or “how do I export a list of just one series?”.
Now, this was possible, but it took a few steps that were not intuitive for many users. You had to:
- Make the selection in the main screen first, e.g. by using folders, the collection status filter or the search box
- Checkbox all comics in the selection, using the checkboxes in the list
- Then use the Print or Export button on the special blue action toolbar above the list
With today’s update, we are making this a lot easier. And while we were at it, we also freshened up the user interface of the Print to PDF and Export to CSV screens.
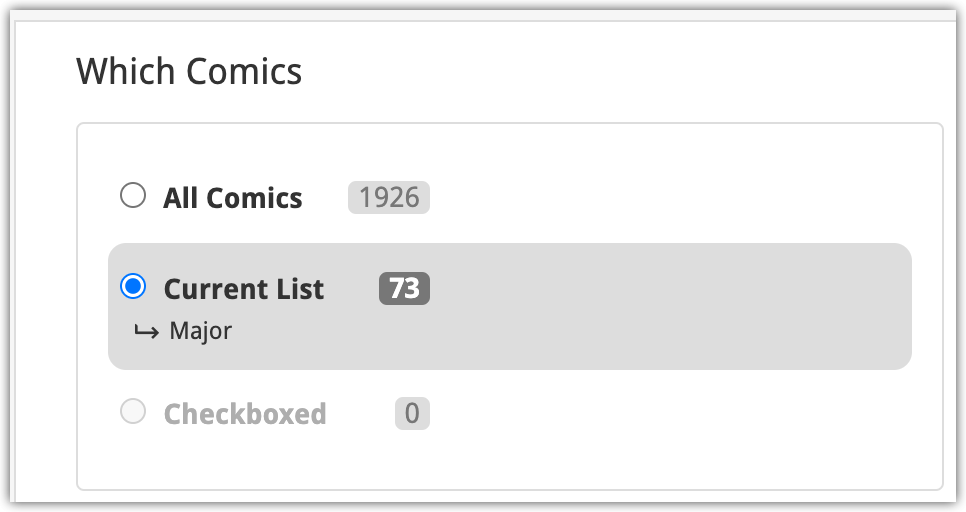
New “Which Comics” selector in Print and Export screens
With today’s update, no more need to checkbox comics before printing/exporting, no more need to use the special Print/Export button on the blue action bar.
Just make your selection in the main screen, then use the regular Print/Export command from the main menu and use the “Current List” option from the new “Which Comics?” selector (selected automatically).

Or if you want to make a more granular selection, first checkbox some comics in the main screen list and then in the Print/Export screen, select the “Checkboxed” option.
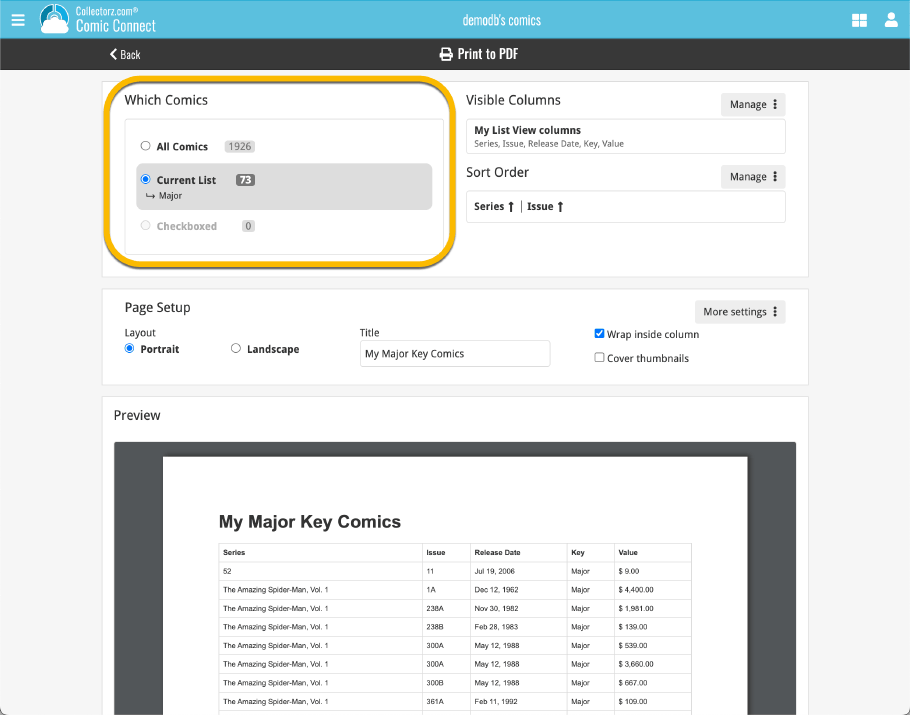
Improved layout of Print / Export screens
While we were adding the new “Which Comics?” selector, we figured we’d take the time and improve the layout and UI of the entire screen.
- The important sections for “Visible Columns” and “Sort Order” were moved to the top
- The Page Setup section was made smaller by showing the commonly used settings only
- The rest of Page Setup settings are now “hidden” behind a “More Settings” button
Screenshot of the redesigned Print to PDF screen:
